The post Belinda Jeffery’s warm lentil salad with beetroot, fennel and goat’s cheese appeared first on .
]]>This earthy salad regularly appears on our lunch table, invariably accompanied by a loaf of sourdough bread to mop up the mustardy dressing. It combines some of my favourite ingredients in the most satisfying way – flinty lentils jostle fine slices of fennel and the dark sweetness of beetroot, bound with a potent mustard dressing and the refreshing green lift of dill. I happily eat this as a stand-alone lunch, but have also served it (minus the goat’s cheese) with both smoked mackerel and kiln cooked salmon, and the combination sings.
Serves 4
12 small or 4 medium-sized beetroot (approx. 400g)
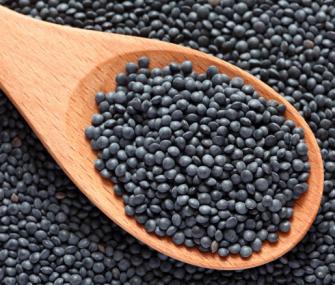
1 heaped cup (220 g) Beluga or Puy-style lentils
3 cups (750ml) cool water
½ medium-sized bulb fennel, very finely sliced, or more if you like
1 tablespoon finely chopped dill
About 150g soft goat’s cheese marinated in olive oil
Tiny dill sprigs, to garnish
Mustard dressing:
1 heaped teaspoon Dijon mustard
100 ml extra-virgin olive oil
3 teaspoons red wine vinegar
1 ½ teaspoons sea salt, or more to taste
Preheat your oven to 180C.
Trim the leaves off the beets leaving about 1 cm of stalk attached to the root. Wash them thoroughly and shake off the excess water, then wrap each one tightly in foil and sit them on a baking tray.
Put the tray in the oven and cook the beets for about 50 minutes, or until they’re tender – larger beetroots could take up to 1 ¼ hours. The best way to check is by sliding a fine metal skewer into one; it should go in with little resistance. When they’re ready, take them out and leave them to cool for about 10 minutes.
Unwrap the beetroots and rub off the skins and stalks with your hands. (I slip on a pair of prep gloves to do this as it’s quite messy and tends to leave your hands with a crimson glow!) Leave them until they’re just cool enough to handle, then slice them lengthwise into halves, quarters or sixths, depending on their size. Pop them into a bowl and sit them in a cool spot.
As lentils can be dusty give them a really, really good wash before cooking them. I sit them in a big fine sieve and swish them around in lots of cold water, changing the water a few times until it’s clear.
Plop the lentils into a medium-sized saucepan and cover them with 3 cups (750 ml) cool water. Bring them to the boil, then reduce the heat and let the lentils bubble gently for about 20 minutes or until they’re cooked but still have a nice little bit of chewiness to them. Start checking them early on (after about 12 minutes) as the cooking time can vary quite a lot depending on how fresh they are.
While the lentils are cooking, make the dressing. Spoon the mustard into a medium-sized bowl and slowly whisk in the oil. When it’s incorporated mix in the vinegar and salt. Taste the dressing and adjust the balance of flavours to suit you, then set it aside.
As soon as the lentils are ready, tip them into a sieve or colander. Give them a few really good shakes to get rid of any excess water, then mix them into the dressing. Leave them in a warm spot, stirring them occasionally. (Although, I suggest serving the salad warm, you can make the dish hours ahead to this point, and continue with the recipe just prior to serving if you’re happy to eat the lentils at room temperature.)
Thoroughly mix the fennel and dill into the lentils, then divide the mixture evenly among 4 plates. Nestle the beetroot wedges into the lentils, then crumble goat’s cheese over the top, and finish off with a sprinkle of dill sprigs.
Beluga lentils…
I’ve only started using these lovely small black lentils recently, and they’re absolutely terrific. Like Puy lentils, they hold their shape when they’re cooked, and have a similar, satisfyingly chewy texture. Their colour fades a little once they’re cooked, however it’s still a rather wonderful dark grey/brown which looks startling when combined with more vibrant tones.
For more recipes from Belinda Jeffery go to: belindajeffery
The post Belinda Jeffery’s warm lentil salad with beetroot, fennel and goat’s cheese appeared first on .
]]>The post Caramel slice with a difference appeared first on .
]]>COCONUT AND CARAMEL SLICE
Makes approx. 24 bars
At last a breath of coolness is starting to creep into our days, and my thoughts can turn to doing a little baking again which is something I tend to avoid as much as possible in the heat of a full-blown Northern Rivers summer. And this lovely, simple slice is a very good way to ease back into it.
The word ‘caramel’ always gets to me, and combined with ‘coconut’ it makes an irresistible combination; here they go together in a buttery shortbread base with a luscious caramel and coconut topping that sets with a thin, crisp crust. When the slice is freshly baked the surface is addictively crunchy, however, once chilled it becomes a bit more chewy, but that is very appealing too, in its own way.
Base:
2 ¼ cups (335g) plain flour
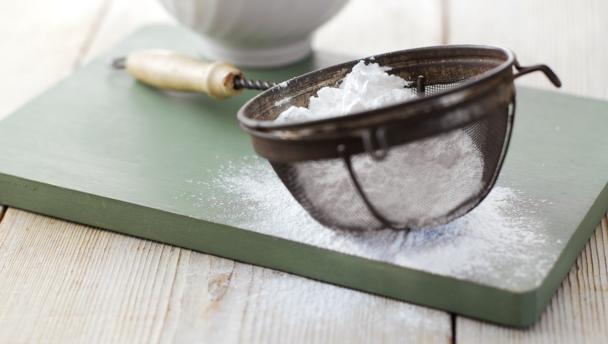
½ cup (80g) icing sugar
250g cold unsalted butter, cut into small chunks
1 teaspoon vanilla extract
Topping:
3 eggs
2 tablespoons coconut cream, stirred
1 tablespoon milk
2 teaspoons vanilla extract
45g unsalted butter, melted and cooled
1 cup (220g) firmly packed brown sugar
½ cup (110g) castor sugar
1 tablespoon plain flour
1 ½ cups (105g) shredded coconut
A handful of lightly toasted flaked almonds, for topping
Icing sugar, for dusting
Line the bottom and sides of a lightly buttered 32 x 24 x 5cm slice tin with baking paper, then set it aside.
For the base, whiz the flour and icing sugar in a food processor. Add the butter and vanilla extract and whiz until the mixture just comes together to form a dough. Press the dough evenly into the bottom of the prepared tin. It tends to look a bit bumpy so I roll a straight-sided tumbler over it to even it out. Chill it in the fridge for 15 minutes – this little rest helps stop it from shrinking when it’s baked.
Preheat your oven to 180C. Bake the base for about 25 minutes or until it’s golden. Transfer it to a wire rack to cool. Reduce the oven temperature to 150C.
Meanwhile, for the topping, lightly whisk the eggs in a large bowl. Whisk in the coconut cream, milk, vanilla extract and butter. In another bowl, mix together both sugars and the flour (or you can whiz these together in the food processor if you still have it out.) Stir the flour mixture into the egg mixture, then add the shredded coconut and mix everything thoroughly. Spoon the topping over the cooled base, and sprinkle the almonds evenly over the top.
Bake the slice for about 45 minutes or until the topping is set and golden. Leave the slice to cool in the tin on a wire rack. Once it’s cool, slice it into fingers or bars; if you briefly chill it in the fridge first you’ll find it cuts more evenly. I use a straight-edged knife for this as a serrated one tends to tear through, rather than cut, the topping – I suspect it’s to do with the strands of coconut.
Layer the bars between sheets of baking paper in an airtight container. Store them in the fridge, where they keep well for up to 1 week. They also freeze well and will be fine for up to 3 weeks. When you’re ready to eat them, dust the bars with a little icing sugar. They’re lovely with a cup of tea or coffee, and when cut slightly larger they make a surprisingly good dessert with a little cream.
For more recipes from Belinda Jeffery go to: belindajeffery
The post Caramel slice with a difference appeared first on .
]]>The post Belinda Jeffery’s lovely light summer salad appeared first on .
]]>I rarely serve entrees when I’m cooking for friends, but just occasionally it’s really nice to have a little something up your sleeve for a special occasion, and this simple but lovely dish is it for me. (Although having suggested it as an entree, I must admit that I have often made this as a lunch for two. ). The combination of gooey, molten cheese with the crunchy salad of celery, parsley and apples is truly wonderful. I only serve small quantities of salad so it acts more like a salsa, however if you would like more, just double the salad and dressing recipes.
SAUTEED HALOUMI WITH CELERY, APPLE, LEMON & PINE NUT SALAD
Serves 4
Lemon dressing:
45 ml olive oil
3 teaspoons lemon juice
3 teaspoons pure cream
1/2 teaspoon finely grated lemon zest
1/4 teaspoon sea salt, or more to taste
Pinch of caster sugar
Salad:
1/4 cup (about 6g) loosely-packed, flat-leaf parsley leaves
Iced water, to soak parsley leaves
1 cup (100 g) very finely sliced celery stalks
1/3 cup small, tender, pale green celery leaves (from the heart)
1/2 medium-sized pink lady, gala or Fuji apple, sliced very finely 1/2 medium-sized pink lady, gala or Fuji apple, sliced very finely
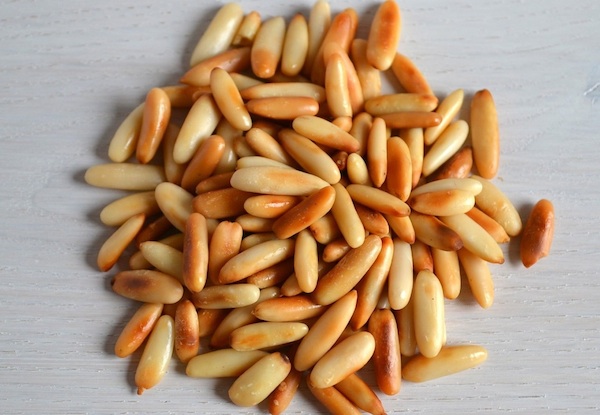
1 1/2 tablespoons roasted pine nuts
2 teaspoons very finely slivered preserved lemon skin
Approximately 1/2 cup (120 ml) olive oil, for cooking
1/3 cup cornflour
180g haloumi cheese, cut into slices about 5mm thick
Lemon wedges, to serve
Thoroughly whisk together all the dressing ingredients in a small bowl until the sugar and salt have dissolved. Taste it, and adjust the lemon/salt/oil balance to suit you, then cover it tightly and refrigerate it until you need it.
Sit the parsley leaves in a small bowl and cover them with iced water (if you’re wondering why you do this, it’s because the water crisps the parsley and also causes it to curl which looks great). Cover the bowl and pop it in the fridge for at least 30 minutes. Toss together the celery stalks and leaves in a medium-sized bowl, cover it, and refrigerate it too. Just before cooking the cheese, thoroughly drain the parsley leaves and gently pat them dry, then add them to the celery along with the apples slices, pine nuts and preserved lemon. Give the dressing a whisk and pour it over the top, then mix everything lightly but thoroughly together and return the salad to the fridge.
To cook the cheese, heat the olive oil in a large non-stick frying pan (or well-seasoned cast iron frying pan) over medium heat. Tip the cornflour into a shallow bowl. Dip the cheese slices into it so they’re coated all over (if the cornflour doesn’t stick, lightly moisten the slices with water), then gently shake off any excess cornflour. Fry the slices in a single layer in the oil for approximately 1 minute or so per side, or until the cheese is golden brown (you may have to adjust the heat a little as you go). Repeat this with any remaining slices. As the slices are ready, scoop them out of the pan onto paper towel to drain, then sit a few slices on each plate. Divide the salad evenly between the plates, and serve immediately with lemon wedges.
To find out more about Belinda Jeffery go to: belindajeffery
The post Belinda Jeffery’s lovely light summer salad appeared first on .
]]>The post Upside-down sticky banana cake appeared first on .
]]>This cake really needs to be eaten the day it’s made to look – and taste – at its most beautiful, glossy best, but I would hasten to say I’ve never found that to be a problem – the hardest thing is trying to keep everyone away long enough to let it cool down a little! However, in the interests of seeing whether it would keep, I managed to snaffle a slice when I made the one in the photo and refrigerated it overnight (with a big note on it threatening dire things to anyone who even thought about eating it!) I gently warmed it the next day and then of course had to eat it…in the interests of research you understand…and it was terrific; the bananas weren’t quite as glossy as when it’s freshly turned out, but the taste and texture were perfect.
Caramel Topping:
60g unsalted butter
3/4 cup brown sugar
Large pinch of salt
4-5 large #just ripe bananas
Cake:
180g self-raising flour
¼ teaspoon salt
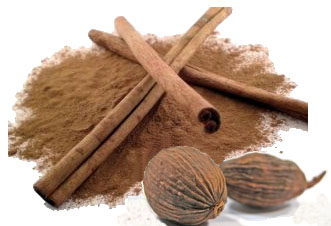
1/2 teaspoon cinnamon
1/4 teaspoon nutmeg
1 medium size very ripe banana
2 tablespoons sour cream
2 eggs
180g castor sugar
90g cultured unsalted butter, in small chunks, at room temperature
1 teaspoon vanilla extract
To serve: Golden syrup and rich cream or vanilla ice cream
# It’s important that the bananas for the caramel topping aren’t too ripe otherwise they collapse and become mushy as they bake, mind you the cake still tastes great, it just doesn’t look as pretty. This works in reverse for the banana that’s part of the cake batter, it’s best if it’s really ripe because it’s sweeter and mixes in more evenly.
Preheat your oven to 180C. Butter a 24-25cm round cake tin and set it aside.
For the caramel topping, melt the butter in a heavy-based saucepan over medium heat. Add the brown sugar and salt and cook the mixture, stirring it occasionally, for a few minutes until it’s glossy – don’t be alarmed if the sugar doesn’t dissolve completely, it tends to form a slush. Just be a little careful as you cook this – don’t let it cook for too long or get too hot as the butter will separate out, not that this is a major tragedy as you can still use the mixture, it’s just a bit more awkward to do so as the sugar hardens.
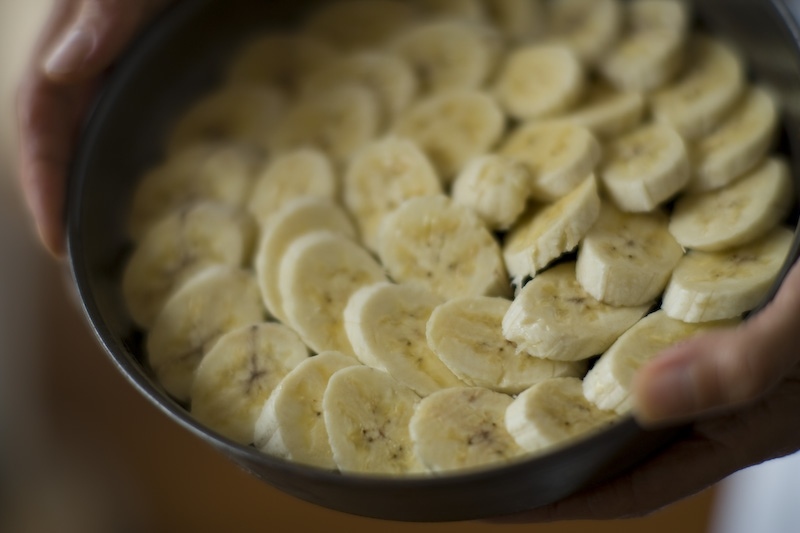
When the caramel is ready, pour it into the prepared tin and tilt it to coat the bottom evenly. (If the topping has separated a bit so the sugar has hardened, just press it in as best you can…it will melt again as the cake bakes.) Now, peel and slice the bananas fairly thickly (about 6-7mm) then sit the slices in overlapping circles over the base of the tins so they completely cover the caramel. Set the tin aside.
Put the flour, salt, cinnamon and nutmeg into a food processor and whiz them together for 10 seconds. Tip them into a bowl. In another bowl, mash the banana then stir in the sour cream. Set both bowls aside.
Put the eggs and sugar into the processor, then whiz them together for 1 minute, stopping and scraping down the sides with a rubber spatula occasionally. Add the butter and vanilla, and whiz again for 40 seconds or so. Now, scrape the mashed banana and sour cream mixture into this and whiz them together for 10 seconds or until they’re just combined. The batter may well look a little curdled at this stage, but don’t worry, it will be fine. Add the flour mixture to the food processor and pulse them together until they’re just combined.
Dollop spoonfuls of the cake batter into the tin, over the bananas and spread it out evenly. Do this fairly carefully so you don’t disturb the bananas underneath.
Bake for 45-50 minutes until the cake is golden and springy when you give it a gentle prod in the centre. Remove it from the oven and leave it to settle in the tin for three minutes. Then carefully loosen it around the sides (watch out for your fingers as the tin is very hot). Sit a serving plate on top of the tin and, holding it with a tea towel to protect your hands, flip the cake and plate over. Sit the plate on the bench and leave the tin on top for 20 seconds – this creates a little bit of steam which helps the cake come out of the tin easily. Gently remove the tin. Don’t worry if some banana slices stick to the bottom of it, just scrape them off and press them back onto the cake. Occasionally, I’ve found the caramel has hardened a little and some bits have stuck to the base of the tin – if this happens to you, very gently warm the base of the tin to dissolve the hardened caramel then drizzle it over the cake. Let the cake cool.
Just before serving, brush a little golden syrup over the top. It’s lovely served warm or room temperature with cream or ice cream. I’d have to say this cake is best eaten the day it’s made. Serves 6-8.
To find out more about Belinda Jeffery go to: belindajeffery
The post Upside-down sticky banana cake appeared first on .
]]>The post Asparagus, herb and goat’s cheese tarts appeared first on .
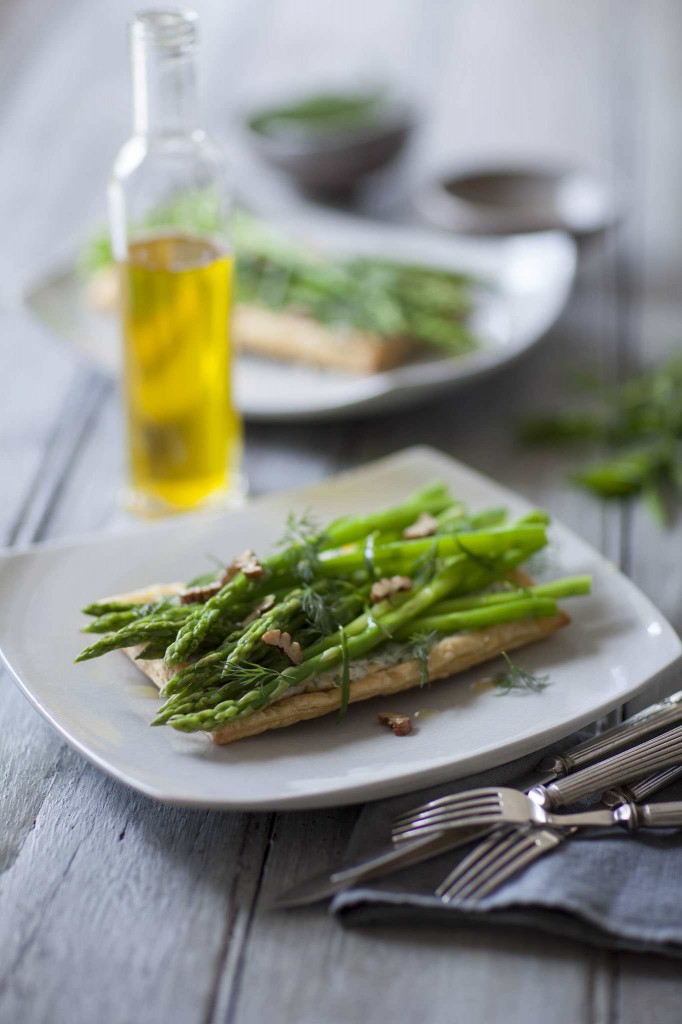
]]>This recipe is from my book, Utterly Delicious Simple Food, (Lantern, 2014), and I thought it was a lovely one at this time of year when local fresh asparagus is starting to appear in the markets.
Although it can seem that anything to do with pastry or tarts is inordinately time consuming, this isn’t necessarily the case, and these lovely tarts are a perfect example of what you can do with a few sheets of ready-rolled pastry. They’ve become a bit of a staple for me when I need something that feels and looks really special, but doesn’t take forever to make. I recently served them to friends for a light lunch along with a vibrant beetroot and pecan salad, and platter of ripe tomatoes, then finished off with a bowl of gently sweetened raspberries topped with a splodge of thick cream swirled with brown sugar and yoghurt. It was such a simple meal, yet everyone loved it and I had no-end of requests for the recipes.
If you can only find very thin spears of asparagus, which happened to me for the photograph, you will need to buy extra as each tart will take about 12 thinner spears.
Serves 4
2 sheets ready-rolled butter puff pastry
36 medium-sized spears green asparagus spears
2 tablespoons roasted pecans, sliced; tiny dill sprigs; and a little crumbled goat’s cheese, optional, to garnish
Goat’s cheese filling:
280g soft goat’s cheese marinated in olive oil and herbs (I use Meredith Dairy, which is terrific)
¼ cup finely chopped dill
2 tablespoons finely chopped tarragon
1 tablespoon finely chopped flat-leaf parsley
1 tablespoon finely snipped chives
Lemon dressing:
¼ cup (60ml) lemon-infused extra virgin olive oil (or use regular extra virgin)
3 teaspoons freshly squeezed lemon juice, or more to taste
½ teaspoon balsamic vinegar, or more to taste
¼ teaspoon caster sugar
½ teaspoon sea salt, or more to taste
Line a large baking tray with baking paper, and set it aside. (You can use two smaller trays if that works better for you.)
Using a ruler as a guide, cut each sheet of pastry in half, then trim each half into a neat rectangle measuring approximately 12cm x 18cm. Use the tip of a sharp knife to lightly score a 1cm border all the way around the edge of each rectangle, being careful not to cut right through the pastry. Sit the rectangles on the prepared tray, then use a fork to pierce the pastry within the scored borders at 2cm intervals. Pop the tray in the fridge for 15 minutes.
In the meantime, preheat your oven to 200C.
To make the goat’s cheese filling, scoop the goat’s cheese into a bowl, mash it to break it up, then thoroughly mix in the herbs.
For the lemon dressing, whisk all the dressing ingredients together in a bowl until the sugar and salt have dissolved, then taste it and adjust the flavours to suit you.
Bake the pastries for 10 – 12 minutes, or until they’re golden, then remove them from the oven and let them cool slightly on the baking tray, pressing down with the back of a spoon inside the border of each one to form a slight well.
While the pastry bases are cooking, trim the woody bases of the asparagus and peel them if you like. When they’re all done, slip the asparagus spears into a large frying pan of lightly salted, boiling water and adjust the heat so the water bubbles gently around them. Cook them for 3 – 5 minutes or until they’re tender but still lovely and green (you may have to do these in batches if your pan is small). As soon as they’re ready, remove them from the pan and dunk them briefly in cool water to stop them cooking, then wrap them in a thick tea towel.
Divide the goat’s cheese mixture among the pastry bases, spreading it evenly into the ‘wells’ in the pastry, then pop the tarts back into the oven for 3 minutes to heat through. Meanwhile, gently mix the asparagus with the dressing.
When the tarts are ready, slide one onto each plate and sit some asparagus spears, higgledy-piggledy, on top. Sprinkle with pecans, dill sprigs and the crumbled goat’s cheese, if using. Serve immediately.
Do aheads…
To make this dish even easier, you can cut the pastry bases, and make the goat’s cheese filling and asparagus dressing a day ahead and store them in the fridge.
To find out more about Belinda Jeffery go to: belindajeffery
Utterly Delicious Simple Food, (Lantern, 2014)
The post Asparagus, herb and goat’s cheese tarts appeared first on .
]]>The post Belinda Jeffery’s Last Minute Christmas Cake appeared first on .
]]>Last Minute Christmas Cake
Makes 1 large or 3 med/small cakes
Although I call this a Christmas cake, truth be known I whip it up regularly through the year as it’s my favourite cake of all – chock-a-block with fruit and fragrant with spices. I make a big cake for us, but I also bake smaller cakes like the one in the photograph, as gifts. For me there is nothing more special than giving or receiving something that is homemade, knowing all the care and love that has gone into creating it.
300g unsalted butter
420g dark brown sugar
1.2kg mixed #dried fruits (I use fruits such as raisins, pitted prunes and dates, sultanas, currants and lovely smoky sun-dried apricots)
2 teaspoons bicarbonate of soda
1 cup (250ml) dark rum, port or muscat
½ cup (125ml) water
½ cup (125ml) cognac
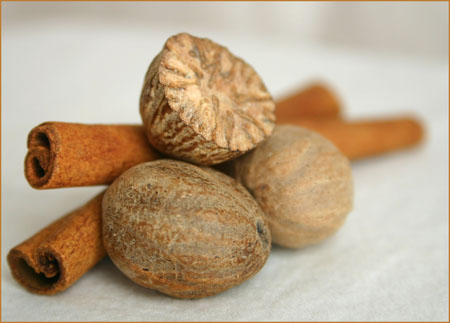
2 teaspoons freshly grated nutmeg
2 heaped teaspoons cinnamon
4 eggs, lightly beaten
2 ½ cups (400g) stone-ground wholemeal plain flour About 150g pecan halves and 120g whole blanched almonds, for decorating
Apricot glaze, optional (see below)
* As far as the dried fruit goes; I tend to use whatever happens to be in the pantry at the time – as long as the quantity is roughly the same the cake will be delicious.
Place the butter in a saucepan large enough to eventually hold all the cake ingredients and melt it over medium heat. Add the sugar and stir to partially dissolve it so it’s wet and slushy.
Meanwhile, slice any large pieces of dried fruit (such as the prunes and dates), into two or three pieces.
Now, tip all the dried fruit, the bicarbonate of soda, rum, port or muscat, water and cognac into the pan with the sugar mixture. Increase the heat to high and keep stirring until the sugar has dissolved. Once it has, stop stirring and bring the mixture to the boil, then reduce the heat and let it bubble gently for four minutes. You need to keep an eye on it and adjust the heat at this stage, as it froths up considerably because of the bicarbonate of soda. When it’s ready, turn off the heat and leave the mixture to cool in the pan. I often make this in the evening and leave it to cool overnight. However, if you do this cover it well – I once left the lid slightly askew and woke to find an army of very inebriated ants weaving their way to and from the pan!
Preheat your oven to 150C.
Butter a 23cm x 23cm x 8cm square cake tin (or three 13cm x 13cm x 8cm cake tins) and line the base and sides with a double thickness of buttered baking paper.
Add the nutmeg, cinnamon and eggs to the dried fruit mixture and stir them in well. Mix in the flour, then leave the batter to sit for a few minutes. Scrape it into the prepared tin/tins and give it a gentle shake to level the top
Now comes one of the most enjoyable things to do: decorating the top of the cake. I love doing this as you can create all sorts of different patterns by marching alternating bands of pecans and almonds across the top, curving them into waves, or creating smaller and smaller squares.
Bake the cake for 2 ¼ – 2 ½ hours (if you are baking smaller cakes, they will take approx. 1 hour and 40 minutes) until it feels firm-ish in the centre when lightly pressed and a fine skewer inserted in the middle comes out clean. After an hour or so, it’s a good idea to check the top; if it’s a good rich brown cover it loosely with a sheet of foil to stop it getting darker.
Leave the cake to cool completely in the tin on a rack, then remove it from the tin, wrap it tightly in cling wrap or foil, and store it in the fridge where it will keep well for up to three months.
Just before serving the cake, brush a little warm apricot glaze over the top, if using.
Apricot glaze (delicious and easy to make)
Boil about ½ cup of apricot jam or conserve with 1 ½ tablespoons of water for five minutes or so until the mixture becomes thick and syrupy (keep an eye on it and stir it regularly so it doesn’t catch and burn on the bottom of the pan). Pour it through a fine sieve into a bowl to remove any bits of apricot skin that may be in it, then brush the hot glaze over the cake and leave it to set.
To find out more about Belinda Jeffery go to: belindajeffery
The post Belinda Jeffery’s Last Minute Christmas Cake appeared first on .
]]>The post Speedy Summer Peach and Amaretti Tartlet appeared first on .
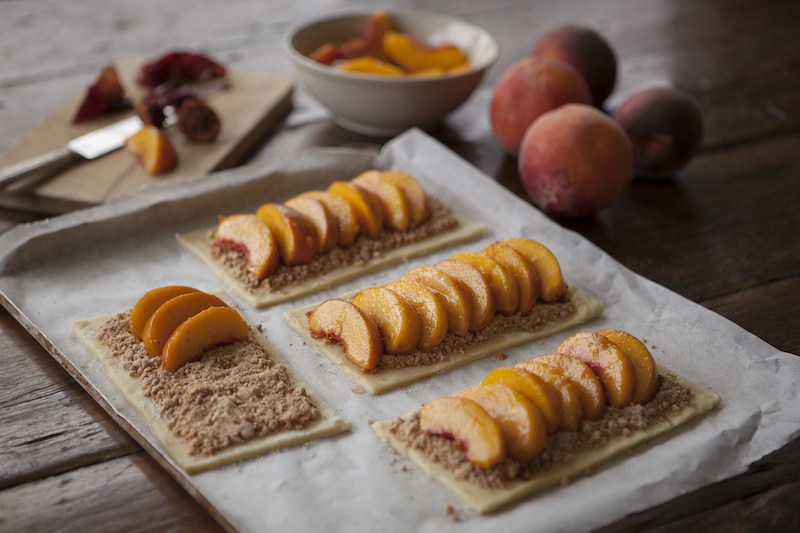
]]>These tartlets really are the most delicious things, and they’re remarkably quick and easy to make for such a gorgeous result. I have to admit that as soon as we’d taken this photo, Rodney, the photographer, and I sat down and demolished one each in an embarrassingly short time! I’d also have to say that if anything they’re even better served barely warm with a scoop of icy-cold vanilla ice cream. The two important things to remember when you’re making them is to use sweet, ripe peaches as otherwise they will taste a bit insipid, and to use butter puff pastry.
If you would like to get these ready well ahead of time, the night before you can cut out the tartlet bases, put them on the oven tray, cover them lightly and chill them. You can also make the amaretti crumbs and store them in an airtight jar. You need then only prepare the peaches and you’ll have them in the oven in no time.
Serves 4
2 sheets ready-rolled butter puff pastry
4 medium-sized sweet, ripe (but not squishy) yellow peaches
1/3 cup (75g) caster sugar
½ – 1 teaspoon vanilla extract
About 1/3 cup (110g) apricot jam, warmed so it’s runny, then strained
Icing sugar, for dusting
Vanilla ice cream or rich cream, to serve
Amaretti crumbs:
60g amaretti biscuits
3 teaspoons caster sugar
½ teaspoon cinnamon
1 tablespoon plain flour
Line a shallow baking tray with baking paper and set it aside.
For the amaretti crumbs, pop the amaretti biscuits into a thick plastic bag (a snap lock bag is ideal), seal it tightly, then finely crush the biscuits with a rolling pin. Tip them into a bowl; thoroughly mix in the caster sugar, cinnamon and flour, and set the mixture aside.
With a ruler as a guide, cut each sheet of pastry in half, then trim each half into a neat rectangle measuring approximately 9cm x 16cm. Use the tip of a sharp knife to lightly score a border, about 8mm wide, all the way around the edge of each rectangle, being careful not to cut right through. Sit the rectangles on the prepared oven tray and pop them in the fridge for 15 minutes.
In the meantime, preheat your oven to 200C.
Halve the peaches, and carefully peel away the skins before slicing them into thickish wedges. (I usually pull away a little skin before I halve the peaches to see how easily they peel. If the skin clings stubbornly to the flesh, you’re best to dunk the whole peaches in boiling water for 20 seconds or so, then quickly drop them into a bowl of cold water. Now try peeling them and the skins should pull away easily.)
Scoop the peach slices into a bowl and sprinkle the caster sugar on top. Drizzle in the vanilla and using your hands, gently mix them all together. (I find hands are best for this, as a spoon tends to make little gouges in the slices.)
Sprinkle 2 tablespoons of the amaretti crumb mixture into the centre of each rectangle and spread it out evenly, being careful to keep it within the scored border. Now sit a fairly tightly overlapping row of peach slices down the length of each rectangle, again keeping them within the border. There will be some sugary peach juices left in the bowl, so drizzle the peaches with these, being careful not to get the juice onto the border as it may burn, or dribble down the sides and stick the pastry layers together so they don’t rise properly.
Pop the tray in the oven and bake the tartlets for about 20 minutes until the pastry is crisp and the peaches tender.
Brush the tartlets (including the pastry border) with some of the warm apricot jam then run them briefly under a medium/hot overhead grill for about 1 minute or until the edges of the peaches and pastry start to caramelise and darken (they may be some very dark bits but don’t worry, they taste delicious.) Watch them like a hawk as they can burn quite easily, and as soon as they’re ready, whisk them out from under the grill, dust them with icing sugar and leave them to cool a little – they’re lovely served warm or at room temperature. (If the tartlets are a good colour when they come out of the oven, there’s no need to grill them. Simply brush the peach slices with the jam, leave them a few minutes then dust the tartlets with icing sugar.)
To serve, simply sit a tartlet on each plate, dust it with a wee bit more icing sugar if necessary, and serve it with a scoop of vanilla ice cream or cream.
For more information on Belinda Jeffery’s recipes go to: belindajeffery
The post Speedy Summer Peach and Amaretti Tartlet appeared first on .
]]>The post Peas, mint and potato – plus a little extra punch appeared first on .
]]>My lovely neighbour and very good cook, Diane Hart, gave me the idea for this salad saying it was one she had been making for years, and that her now-adult children still love it and often cajole her into making it when they visit.
I can well understand why, as I adore peas, mint and potato together – it’s such a brilliant and time-honoured combination – but I also wondered how a little ‘bite’ from some chives and a sprinkle of crisp, salty bacon (I do so love bacon and peas) would go in it – and as it turns out, they go very well indeed!
Potato, Pea and Bacon Salad (serves 8-10)
1.3kg waxy potatoes, scrubbed
350g frozen (or fresh, in season) peas
½ cup sour cream
½ cup good quality mayonnaise
1/3 cup tightly-packed mint leaves
1-2 tablespoons snipped chives/sliced shallots – to try and check
Sea salt crystals, to taste
2 large rashers bacon, rinds removed and bacon diced
Small mint leaves, to garnish
Cook the potatoes whichever way you like, until they’re just tender when pierced with a fine skewer. (I usually leave the skins on and steam them whole, however if I’m short on time, I’ll peel , halve and quarter them before cooking, so they cook and cool faster, and just need chopping into chunks). Drain them and leave them to cool a little, then peel off the skins and let them cool completely. Finally cut them into bite-sized chunks and scoop them into a large bowl.
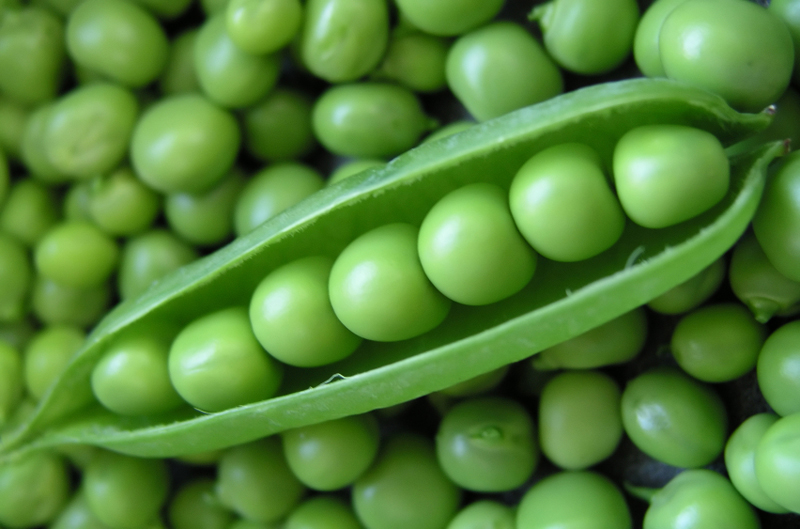
While the potatoes are cooking, steam the peas in another saucepan for about 3 minutes or until they’re just tender and bright-green. Drain them, then immediately dunk them into a bowl of ice and water to stop them cooking and set the colour. Drain the peas well in a sieve.
Tip the most of the peas into a blender (or food processor fitted with the steel blade), reserving a handful to scatter over the top of the salad. Dollop in the sour cream and mayonnaise, then add the mint leaves, chives and salt. Blend them together to form a gloriously gloopy, vivid green puree. Taste it, and add a bit more of any of the ingredients you think it needs.
Pour the pea puree over the potatoes, and using your hands (I slip on prep gloves for this as it’s pretty messy) gently mix the two together, then pile the mixture into a serving bowl.
Shortly before serving the salad, cook the diced bacon in a small frying pan over medium heat until it’s done to your liking. When the pieces are ready, scoop them out of the pan onto brown paper (or paper towel) to drain.
Finally, scatter the reserved peas, bacon and mint leaves over the top of the salad, and serve.
For more information on Belinda Jeffery’s recipes go to: belindajeffery
The post Peas, mint and potato – plus a little extra punch appeared first on .
]]>The post It’s blueberries by the bucket load for Belinda appeared first on .
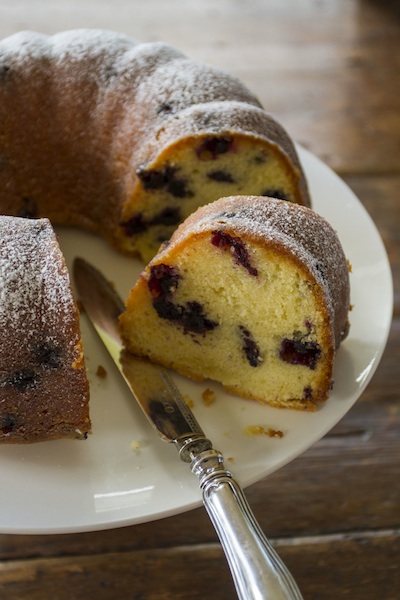
]]>Now we’re back to buying blueberries by the bucket from the farmers market, I’m indulging myself by flinging them in or on all sorts of dishes – granola, pancakes, muffins, all benefit from their sweet tang. However, I think they’re particularly lovely paired with lemon, and never more so than in this simple cake. It’s whizzed up in a food processor, and has a wonderful zingy lemon flavour which comes not only from the batter, but from a thin, lemon glaze that is brushed over it. It’s perfect for afternoon tea, and also makes a fantastic dessert served warm with a scoop of vanilla ice cream.
BLUEBERRY, LEMON & SOUR CREAM CAKE
3 cups (450g) plain flour
1/2 teaspoon salt
1/2 teaspoon bicarbonate of soda
3 eggs
2 cups (440g) caster sugar
250g unsalted butter, in chunks
1 cup (250ml) sour cream
3 heaped teaspoons finely chopped lemon zest
2 1/2 tablespoons strained lemon juice
200g fresh or frozen blueberries
extra plain flour, for coating the tin and dusting the berries
Lemon glaze
1 cup (160g) icing sugar mixture, sifted
1/4 cup (60ml) strained lemon juice
30g melted unsalted butter
Icing sugar, for dusting
Preheat the oven to 160C. Butter and flour a 24 – 25cm bundt tin.
Whiz the flour, salt and bicarbonate of soda in a large food processor, until they’re well mixed, then tip them into a bowl. Put the eggs and sugar into the processor and whiz them for a minute. Add the butter and process the mixture for another minute until it’s thick and creamy.
In a small bowl, whisk together the sour cream and lemon zest and juice, then pour this into the mixture in the processor. Whiz the whole lot for 10 seconds, then add the reserved flour mixture and pulse with quick on/off bursts, stopping and scraping down the sides once or twice, until it’s just combined.
Toss the blueberries in a dessertspoonful of flour so they’re lightly coated.
Remove the bowl from the processor and use a rubber spatula to gently stir in the blueberries. Spoon the batter into the prepared tin and smooth the surface. Bake it for 1 π hours, or until a fine skewer inserted in the middle comes out clean. When it’s ready, take the cake out of the oven, sit it on a cooling rack, and leave it to settle in the tin for 10 minutes.
Meanwhile, mix together all the glaze ingredients in a bowl until they’re smooth. Using a thin palette knife, carefully loosen the edges of the cake. Invert the cake onto the cooling rack and gently ease off the tin. With a plate underneath to catch any drips, brush the cake all over the glaze. Keep brushing on layers of glaze until there is none left – the cake will slowly absorb it. Leave it to cool completely.
To serve the cake, gently transfer it to a stand or plate and dust it with icing sugar. It’s wonderful eaten with a scoop of lightly whipped cream, or vanilla ice cream. Any leftover cake keeps well in an airtight tin for up to three days. It also freezes really well, and can be gently warmed in a microwave oven. Serves 12 -14.
Continental (cultured unsalted) butter is my all-time favourite butter, and I always keep a stock in the freezer. It has a delectable tang, and makes the best cakes, pastries, biscuits, puddings, and anything else you can think of that uses butter!
For more information on Belinda Jeffery’s recipes go to: belindajeffery.com.au/home.html
The post It’s blueberries by the bucket load for Belinda appeared first on .
]]>The post Sensationally citrus salad appeared first on .
]]>When we picked up sticks 15 years ago and moved to our home in Byron Shire, the last thing I expected to find thriving in our humid climate were citrus trees. Yet they absolutely love it here, and despite our awful clay soil and at times, monsoonal rainfall, our citrus trees have flourished. We have limes, lemons, oranges and mandarin trees, and now at last, we’ve planted my favourite of all – a blood orange.
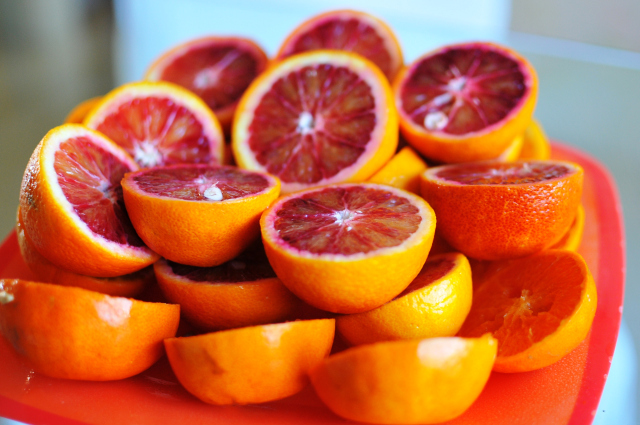
I love the way that the fruit looks quite plain on the outside, however once cut they reveal their startling crimson and tangerine-coloured flesh with its wonderful, rich orange flavour. The brilliantly-coloured juice would have to be the best breakfast eye-opener I know, however more often than not when I only have a few fruit I use them in this beautiful salad, which stretches just a handful of blood oranges into a stunning winter salad for four.
(BTW, if you’re pushed for time, reduce the orange juice as per the recipe for the orange mayonnaise, but then just stir it into some ready-made mayo).
SMOKED SALMON, FENNEL AND BLOOD ORANGE SALAD
Serves 4
3 – 4 navel oranges, depending on size
3 – 4 blood oranges, depending on size
2 medium-sized (or 1 ½ large) bulbs fennel
Approx. 350g hot-smoked (also called smoked roasted) salmon fillets
Small mint leaves, to garnish
Orange mayonnaise:
1 cup (250 ml) freshly-squeezed #orange juice, strained
1 egg
200 ml olive oil
50 ml extra virgin olive oil
1 – 2 teaspoons white wine vinegar, to taste
2 teaspoons freshly squeezed lemon juice
1 teaspoon sea salt, or more to taste
# If by any chance you have a plethora of blood oranges, use the juice in the mayonnaise – it gives it a lovely flavour and soft pink hue.
For the mayonnaise, pour the orange juice into a small saucepan and sit it over high heat. Bring the juice to the boil, then leave it to bubble vigorously, swirling the pan regularly, until it has reduced to about 2 tablespoons of syrupy juice. (Keep an eye on it towards the end of the cooking time as it scorches easily). Remove it from the heat and let it cool a little.
Plop the egg into a blender, and then with the blender going, ever-so slowly dribble in the olive oils. Basically you’re making a thin mayonnaise, so start off by dripping the oil in and then slowly increase the rate so a fine thread of oil streams in – the mixture will thicken as more oil is added. Finally, with the blender still going, pour in the vinegar, lemon juice, reduced orange juice and salt. The mixture will be a little thinner than
regular mayonnaise but that’s fine, as it should have more of a sauce-like consistency. Taste it and adjust the salt/lemon/vinegar balance to suit you,then scrape it into a container and store it in the fridge until you need it
(you can make it a couple of days ahead of time if you like). It’s best to get all the salad ingredients ready before starting to put this together. Peel the oranges with a very sharp knife, making sure no white pith remains, then cut down between the membranes to release the segments into a bowl. Halve the fennel bulbs and slice them very, very finely (a mandolin is fabulous for this) and flake the fish into nice chunks.
To assemble the salads, spoon a little orange mayonnaise into the middle of each plate and sit a small pile of fennel strips on top. Scatter some orange segments over the fennel, then top these with chunks of smoked trout. Drizzle a little of the orange mayonnaise on top then repeat the layers, finishing off with a tiny bit more mayonnaise and a scattering of mint leaves. Serve any remaining dressing separately.
To find out more delicious Belinda Jeffery recipes go to: belindajeffery
The post Sensationally citrus salad appeared first on .
]]>